GOQii

Blog

  • HOME
  • HEALTHY LIVING
  • FITNESS
  • HEALTHY RECIPES
  • USER STORIES
  • KARMA
  • BUY GOQii

July 20, 2026 By Bhumi Mehta 3 Comments

Yoga for Seasonal Viral Infections: A 5-Level Approach to Supporting Recovery

yoga therapyThe Big Question: When seasonal changes leave you with a cold, sore throat, or mild viral illness, can yoga help you feel better while your body recovers?
Seasonal weather changes—especially during the monsoon and winter months—often bring an increase in viral infections such as the common cold and other upper respiratory illnesses. While adequate rest, hydration, good nutrition, and medical care remain the cornerstones of recovery, gentle yoga practices may help ease discomfort, reduce stress, and support overall wellbeing during the healing process.

Rather than viewing recovery as purely physical, yoga takes a holistic approach by nurturing the body, breath, mind, and emotional wellbeing. This five-level framework offers simple practices that may help you feel more comfortable while your immune system does what it is naturally designed to do.

Important: If you have a high fever, severe weakness, chest pain, or difficulty breathing, avoid yoga entirely and seek medical advice promptly.

Level 1: Supporting the Physical Body

When you’re recovering from a viral illness, stiffness, fatigue, and nasal congestion can make even simple movements uncomfortable. Gentle yoga postures may help improve mobility, encourage comfortable breathing, and relieve muscular tension.

A. Uttanasana (Standing Forward Bend)yoga therapyThis gentle forward bend may temporarily ease the feeling of nasal congestion for some people while stretching the back of the body. Move slowly and avoid the pose if you feel dizzy.

B. Setu Bandhaasana (Bridge Pose)Bridge Pose gently opens the chest and stretches the front of the body, which some people find helps them breathe more comfortably. Support your hips with a yoga block or cushion if needed.

C. Viparita Karani (Legs-Up-the-Wall Pose)One of the most restorative yoga poses, this encourages deep relaxation and may help reduce feelings of tiredness after a prolonged illness. It also provides gentle relief for tired legs after long periods of inactivity.

D. Adho Mukha Svanasana (Downward-Facing Dog)If your energy levels allow, this pose stretches the spine and shoulders while encouraging gentle chest expansion. Skip this pose if you feel weak, light-headed, or feverish.

E. Ustrasana This asana opens up the chest and clears out all the passages. It is essential to try and breathe as much as you can while you are in this pose. This will help open up all the blocked areas that are causing the cold.

F. Matsyasana (Fish Pose)A supported version of Fish Pose using a cushion or yoga bolster beneath the upper back can encourage gentle chest opening and comfortable breathing.

Level 2: Supporting the Breath

Breathing exercises can help calm the nervous system and encourage slow, comfortable breathing during recovery. The goal here is relaxation—not force.

  • Gentle Diaphragmatic Breathing: Place one hand on your abdomen and breathe slowly through your nose, allowing your belly to rise and fall naturally. Practise for 5–10 minutes.
  • Nadi Shodhana (Alternate Nostril Breathing): If your nose isn’t completely blocked, gentle alternate nostril breathing may promote relaxation and reduce stress. Avoid forcing the breath if you are heavily congested.
  • Ujjayi Breathing: Soft Ujjayi breathing may create a soothing sensation in the throat while encouraging slow, controlled breathing. Keep the breath gentle and comfortable.

Avoid During Acute Illness: Practices such as Kapalabhati and Bhastrika involve forceful breathing and may not be appropriate during an active viral infection, fever, or significant respiratory symptoms. Consider returning to these techniques only after you have fully recovered and under the guidance of a qualified yoga instructor.

Level 3: Supporting the Mind

Being unwell can affect more than just your body. Fatigue, disrupted sleep, and frustration often increase stress, which can make recovery feel even more difficult. Simple meditation practices may help reduce stress and promote emotional wellbeing.

  • Spend 5–10 minutes sitting or lying down comfortably.
  • Focus purely on your breathing without trying to change its rhythm.
  • If your mind wanders, gently and without judgment bring your attention back to your breath.

Level 4: Prioritising Rest and Recovery

One of the biggest mistakes people make is returning to their normal routine too quickly. Recovery requires massive amounts of internal energy.

  • Shavasana (Corpse Pose): Although it appears simple, Shavasana encourages deep physical relaxation and allows your body to rest without unnecessary muscular effort. Even 10–15 minutes of intentional rest can help you feel refreshed during recovery.

Listen to your body and allow yourself ample time to recover fully before returning to intense physical activity.

Level 5: Building Emotional Resilience

Illness can leave you feeling discouraged, especially if symptoms linger longer than expected. Yoga encourages self-awareness and self-compassion.

Whether through quiet reflection, gratitude, gentle chanting, or prayer, taking a few moments to cultivate emotional resilience can help you cope with the temporary challenges of illness. While these practices don’t treat infections directly, they heavily support your overall sense of wellbeing during recovery.

When Should You Avoid Yoga?

Rest is often the best medicine. Stop any physical practice and seek medical advice if you experience:

  • High fever
  • Difficulty breathing or shortness of breath
  • Chest pain
  • Persistent dizziness
  • Severe fatigue
  • Significant dehydration
  • Worsening symptoms or symptoms lasting longer than expected

Resume physical activity gradually only once you begin feeling significantly better.

Yoga cannot cure viral infections, but it can be a highly valuable complementary practice during recovery. Gentle movement, breathing exercises, meditation, and adequate rest may help reduce stress, improve comfort, and support overall wellbeing while your body heals naturally. The key is to practise with strict self-awareness, respect your energy levels, and allow yourself the time you need to recover fully.

Pro Tip: Recovering from an illness is the perfect time to slow down and listen to your body. The GOQii App offers guided yoga sessions suitable for different fitness levels, and your GOQii Personalised Health Coach can help you choose appropriate practices based on your exact recovery stage.

Frequently Asked Questions (FAQs)

  1. Is it safe to practise yoga during a cold?

If your symptoms are mild and you don’t have a fever, gentle restorative yoga may help you relax and ease physical stiffness. Avoid strenuous or heated practice until you feel completely better.

  1. Can yoga boost immunity?

Regular physical activity, including yoga, contributes to overall health and stress management, which are vital components of a healthy immune system. However, yoga should not be considered a direct treatment for viral infections or a replacement for proper medical care.

  1. Which yoga poses are best during recovery?

Restorative poses such as Viparita Karani (Legs-Up-the-Wall), supported Matsyasana (Fish Pose), and Shavasana (Corpse Pose) are generally much better suited to recovery than vigorous, standing Vinyasa sequences.

  1. Should I do Kapalabhati if I have a cold?

No. Forceful breathing exercises such as Kapalabhati and Bhastrika are generally best avoided during an active illness, especially if you have a fever or significant respiratory symptoms, as they can cause dizziness and irritate inflamed airways.

#BeTheForce  

Disclaimer: This article is intended for educational purposes only and should not replace professional medical advice, diagnosis, or treatment. Consult a qualified healthcare provider if your symptoms are severe, worsen, or are accompanied by high fever, chest pain, or difficulty breathing. Yoga should be practised within your comfort level and, where appropriate, under the guidance of a qualified instructor.

July 16, 2026 By Neha Goyal 1 Comment

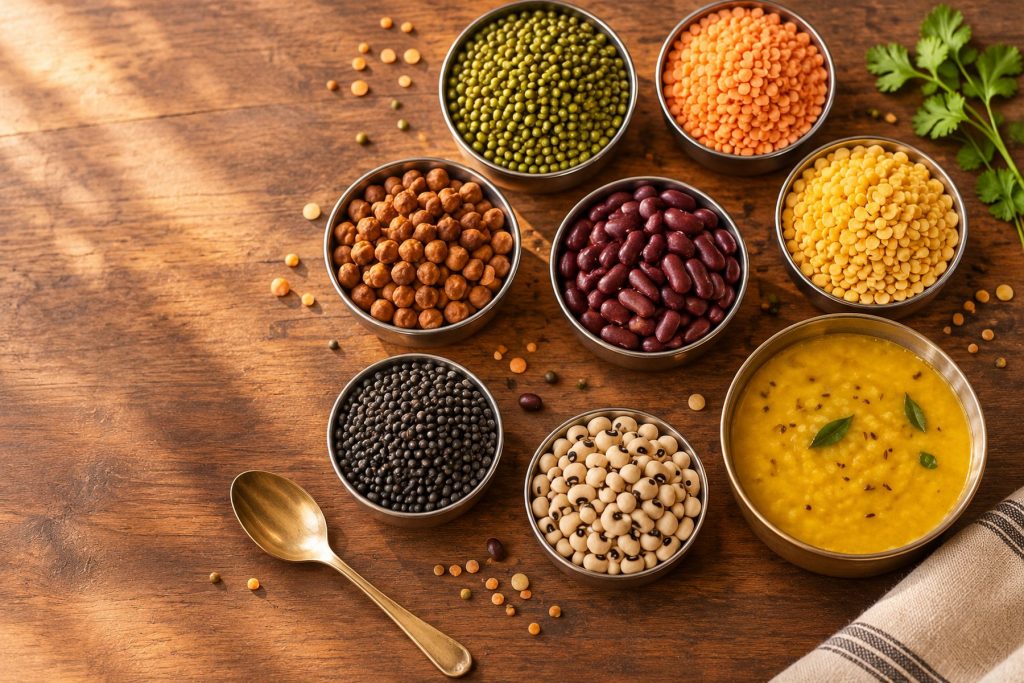
Healthy Eating: The Power-Packed Quinoa Chickpea Salad

quinoa chickpea saladThe Big Question: Have you ever eaten a salad for lunch, only to feel hungry again a couple of hours later?

Not all salads are created equal. While bowls filled with leafy greens and vegetables are rich in vitamins and minerals, they may not always provide enough protein, fibre and complex carbohydrates to keep you satisfied for long.

The key to a truly nourishing salad is balance. This Quinoa Chickpea Salad combines whole grains, legumes and colourful vegetables to create a wholesome meal that’s rich in plant-based protein, dietary fibre and essential nutrients. Whether you’re looking for a healthy lunch, a post-workout meal or a quick dinner, this recipe delivers sustained energy without feeling heavy.

Why This Salad Works

A balanced meal should nourish your body, keep you satisfied and provide steady energy throughout the day. This recipe combines ingredients that complement each other nutritionally.

Ingredient Nutritional Benefit
Quinoa Provides complex carbohydrates, fibre and all nine essential amino acids.
Chickpeas Rich in plant protein, fibre and iron.
Fresh Vegetables    Add vitamins, minerals, antioxidants and crunch.
Lemon Juice Adds freshness and may help improve iron absorption from plant foods.
Ghee or Olive Oil Provides healthy fats that support the absorption of fat-soluble vitamins.

The combination of protein, fibre and healthy fats helps slow digestion, supporting satiety and more stable energy levels.

Why You’ll Love This Recipe

  • Rich in plant-based protein
  • High in dietary fibre
  • Naturally gluten-free (when prepared with certified gluten-free quinoa)
  • Meal-prep friendly
  • Colourful, fresh and satisfying
  • Ready in around 30 minutes

Recipe Overview

Category Details
Preparation Time    15 minutes
Cooking Time 15 minutes
Total Time 30 minutes
Serves 2
Difficulty Level Easy

Ingredients

Ingredient Quantity
Quinoa ⅓ cup
Chickpeas (Kabuli Chana) ½ cup (boiled)
Garlic 1 tsp (finely chopped)
Capsicum ¼ cup (finely chopped)
Onion ¼ cup (finely chopped)
Cucumber 1 medium (diced)
Tomato 1 medium (diced)
Green chilli 1 tsp (finely chopped, optional)
Fresh coriander 4 tbsp (chopped)
Ghee (or Extra Virgin Olive Oil) 1 tsp
Cumin seeds ¼ tsp
Turmeric powder ¼ tsp
Asafoetida (Hing) A pinch
Water ½ cup
Lemon juice 1 tsp
Salt To taste

How to Prepare

  1. Prepare the Quinoa: Rinse the quinoa thoroughly under running water to remove its natural coating (called saponin), which can leave a slightly bitter taste. Soak it for 30–60 minutes before cooking.
  2. Temper the Spices: Heat the ghee (or olive oil) in a deep pan. Add cumin seeds. Once they begin to crackle, add hing and chopped garlic. Sauté for about 30 seconds until fragrant.
  3. Cook the Quinoa: Add water and bring it to a boil. Stir in the salt, turmeric, and quinoa. Cover and cook over medium-low heat for about 10–12 minutes until the water is absorbed and the grains become fluffy. Allow it to cool.
  4. Assemble the Salad: In a large bowl, combine the cooked quinoa, boiled chickpeas, onion, capsicum, cucumber, tomato, green chilli, and fresh coriander. Add lemon juice and gently toss until everything is evenly mixed. Serve immediately.

Approximate Nutrition (Per Serving)

Nutrient Approximate Amount
Calories 300 kcal
Protein 12 g
Carbohydrates 40 g
Dietary Fibre 10 g
Fat 9 g

Values are approximate and may vary depending on ingredient brands and serving sizes.

Make It Your Own

This salad is easy to customise. Try adding:

  • Grilled paneer for extra protein
  • Tofu for a vegan version
  • Avocado for healthy fats
  • Pumpkin or sunflower seeds for crunch
  • Baby spinach or rocket leaves
  • Roasted sweet potato
  • Pomegranate seeds for natural sweetness

Meal Prep & Storage Tips

This salad is ideal for meal prep:

  • Store in an airtight container in the refrigerator for up to 2 days.
  • Keep the lemon juice separate if preparing ahead to maintain freshness.
  • Allow refrigerated quinoa to return to room temperature before serving for the best texture.

Pro Tips

  • Rinse the Quinoa Well: Removing saponins helps eliminate bitterness.
  • Use Leftover Chickpeas: Cooking chickpeas in batches makes weekday meal preparation much faster.
  • Add Fresh Herbs Just Before Serving: Fresh coriander and lemon juice brighten the flavours and maintain freshness.
  • Don’t Overcook the Quinoa: Perfectly cooked quinoa should be fluffy rather than mushy.

Who Can Enjoy This Salad?

This recipe is suitable for:

  • Busy professionals
  • Students
  • Fitness enthusiasts
  • Vegetarians
  • People looking to increase fibre intake
  • Meal-prep lovers

Individuals with kidney disease or specific dietary restrictions should consult their healthcare provider or dietitian regarding portion sizes and protein intake.

Healthy eating doesn’t have to be complicated. A balanced salad should leave you feeling nourished, satisfied and energised—not searching for snacks an hour later.

By combining quinoa, chickpeas and fresh vegetables, this recipe provides a wholesome mix of plant-based protein, dietary fibre and complex carbohydrates that can support sustained energy and overall wellbeing. Simple ingredients, prepared thoughtfully, can transform an ordinary salad into a complete meal.

Pro Tip: Looking for personalised nutrition guidance? Track your meals, water intake and daily habits on the GOQii App. Your GOQii Personalised Health Coach can recommend meal plans based on your health goals, activity levels and dietary preferences. Explore even more healthy recipes and practical nutrition tips—all in one place.

Frequently Asked Questions (FAQs)

  1. Is quinoa healthier than rice?

Both can be part of a healthy diet. Quinoa contains more protein and fibre than white rice, making it a nutrient-dense option for many meals.

  1. Can I make this salad ahead of time?

Yes. Store it in an airtight container in the refrigerator for up to two days. Add lemon juice just before serving for the freshest flavour.

  1. Is this recipe suitable for weight management?

This salad is rich in protein and fibre, which may help improve satiety as part of a balanced eating pattern. Weight management depends on your overall diet, physical activity and lifestyle.

  1. Can I add other vegetables?

Absolutely. Carrots, spinach, roasted sweet potato, avocado, beetroot and broccoli all work well in this recipe.

#BeTheForce 

Disclaimer: This recipe is intended for educational purposes only and should not be considered personalised nutrition advice. Nutritional requirements vary from person to person. Consult a qualified healthcare professional or registered dietitian for dietary guidance tailored to your individual health needs.

July 15, 2026 By Asmita Maredia 4 Comments

Sitting for Hours? Try These Simple Office Workouts to Stay Active!

office workoutHow many hours do you spend sitting each day? If you work a desk job, the answer is probably too many! The average office worker sits for 6-10 hours daily, which can lead to back pain, fatigue, poor posture, and increased health risks such as obesity and heart disease. But don’t worry—staying active at your desk is easier than you think!

Even if you go to the gym, prolonged sitting can still take a toll on your body. These simple office workouts will help you keep your body moving and your mind refreshed without leaving your desk.

Office Workouts You Can Do at Your Desk

1.Walk & Move More

  • Set an alarm every 45 minutes to stand up and move. Aim for at least 1-2 minutes of movement during each break.
  • Walk to fill your water bottle, use the printer, or take a quick break.
  • Take the stairs instead of the lift – two at a time for extra burn!
  • If possible, pace around while on phone calls.

2. Neck & Shoulder Stretches

  • Neck Stretch: Tilt your head to one side and hold for 5 seconds. Repeat 5 times on each side.
  • Head Rotation: Slowly roll your head clockwise and anti-clockwise 5 times.
  • Shoulder Shrug: Raise your shoulders as high as possible, hold for 5 seconds, then relax.

3. Arm & Wrist Exercises

  • Arm Stretch: Cross one arm over your body and pull it towards you with the other hand.
  • Triceps Stretch: Place one hand behind your neck and pull your elbow with the other hand.
  • Wrist Rotations: Roll your wrists 10 times clockwise and anti-clockwise.
  • Finger Stretch: Extend fingers as far as possible, hold for 5 seconds, then make a tight fist and hold for another 5 seconds. Repeat 5 times.

4. Back & Posture Fixers

  • Seated Back Stretch: Place your hands on the edge of your desk and push your chair back until your head is between your arms, looking at the floor. Hold for 10 seconds and repeat 5 times.
  • Overhead Stretch: Interlock your fingers, stretch your arms towards the ceiling, and hold for 5 seconds. Repeat 5 times.

5.  Leg & Lower Body Movements

  • Seated Leg Raises: Straighten one leg, hold for 5 seconds, lower halfway and hold again, then relax. Repeat with the other leg 5 times each.
  • Thigh Stretch: Stand, grab your ankle and pull it towards your buttocks. Keep your back straight and hold for 10 seconds. Repeat 5 times on each leg.
  • Calf Stretch: Place one foot on a chair and bend forward until you feel the stretch. Hold for 5 seconds and switch legs.

More Office Workout Tips To Keep You Active! 

  • Use a standing desk if available to reduce prolonged sitting.
  • Maintain good posture—sit with your back straight and feet flat on the floor.
  • Consider an exercise ball instead of a chair for better core engagement.
  • Park further away from the office entrance to increase your walking time.
  • When you can—stand rather than sit, and walk rather than stand!

These simple office workouts help reduce muscular stress, improve posture, and keep you active throughout the day. Even small movements can make a big difference to your health and productivity.

💡 Try to avoid long sitting hours by taking short breaks and staying active! If you experience any pain, here’s what you can do to prevent further injuries.

💬 How do you stay active at work? Share your tips in the comments!

#BeTheForce 

Disclaimer: The information provided in this blog is for general awareness and educational purposes only. It is not intended to replace professional medical advice, diagnosis, or treatment. Always consult a qualified healthcare provider for personalised medical guidance or concerns related to your health. Images shown are for representation purposes only and may not depict the exact recommendations or outcomes.
July 14, 2026 By GOQii 11 Comments

Planks: The Quick and Easy Way to Stay Fit!

Benefits of PlanksThe Big Question: Can one simple exercise strengthen your core, improve posture, build full-body stability, and fit into even the busiest schedule?

Between work deadlines, family commitments, and daily responsibilities, finding time to exercise isn’t always easy. While many people believe they need long gym sessions to stay fit, the truth is that a few minutes of focused movement can make a meaningful difference.

One exercise that consistently delivers excellent results is the plank. It requires no equipment, very little space, and can be performed almost anywhere. More importantly, it engages multiple muscle groups simultaneously, making it one of the most effective bodyweight exercises for improving strength, stability, and overall fitness. Whether you’re just beginning your fitness journey or looking to level up your workouts, planks deserve a permanent place in your routine.

Why Are Planks So Effective?

Unlike standard crunches or sit-ups, which mainly target the front abdominal muscles, planks activate your entire core while recruiting muscles throughout your entire body to fight against gravity. A correctly performed plank works your:

  • Rectus abdominis: The front abdominal muscles.
  • Transverse abdominis: The deep core muscles that wrap around your spine.
  • Obliques: The side abdominal muscles.
  • Lower back and Glutes: The posterior chain that supports your pelvis.
  • Shoulders and Chest: For upper body stability.
  • Quadriceps and Hip Stabilizers: To keep your lower body rigid and aligned.

These muscles work seamlessly together to stabilize your spine, improve your movement efficiency, and support everyday activities—from safely lifting heavy groceries to climbing a steep flight of stairs.

8 Powerful Benefits of Planks

  1. Builds Foundational Core Strength

Your core acts as the body’s foundation. A stronger core supports better physical movement, protects your spine, and improves performance during everyday activities and sports.

  1. Improves Posture naturally

Weak core muscles often contribute to slouching and poor posture. Regular planks strengthen the specific muscles that keep your shoulders, back, and hips properly aligned, helping you stand taller and sit more comfortably.

  1. Supports Spinal Stability

Strong core muscles help distribute forces more evenly across your spine, reducing unnecessary strain on your lower back. While planks are not a medical treatment for chronic back pain, they are a vital part of a balanced exercise program for improving spinal stability.

  1. Improves Balance and Coordination

Maintaining a plank challenges your body’s ability to remain stable. This improves your baseline balance, coordination, and body awareness—skills that become increasingly important as we age.

  1. Enhances Athletic Performance

Whether you run, cycle, swim, play sports, or lift weights, a stronger core improves the transfer of force between your upper and lower body, making all movement more efficient and powerful.

  1. Increases Muscular Endurance

Unlike explosive, high-impact exercises, planks build endurance by training your muscles to maintain tension over a sustained period of time. This helps you perform daily physical activities with far less fatigue.

  1. Requires Zero Equipment

One of the biggest advantages of planks is their universal accessibility. You don’t need a gym membership, a bench, or expensive equipment—just enough floor space to stretch out.

  1. Saves Valuable Time

A focused plank routine lasting just 5 to 10 minutes can engage nearly every major muscle group in your body, making it the ideal workout for busy lifestyles.

How to Perform the Perfect Forearm Plank

Proper form is infinitely more important than how long you can hold the position. Follow these structural steps to get it right:

  • Lie face down on a yoga mat or comfortable floor surface.
  • Position your elbows directly beneath your shoulders.
  • Keep your forearms parallel to each other or gently clasp your hands together.
  • Extend your legs straight out behind you and lift up onto your toes.
  • Tighten your abdominal muscles intensely, as though preparing for a punch.
  • Squeeze your glutes tightly to stabilize your pelvis.
  • Keep your ribs pulled down and avoid arching your lower back.
  • Maintain one straight, rigid line from your head down to your heels.
  • Keep your neck neutral by looking at the floor slightly ahead of your hands.
  • Breathe normally throughout the exercise—do not hold your breath!

Remember: Good form for 20 seconds always beats a 2-minute hold with poor technique.

5 Plank Variations to Challenge Yourself

As your core gets stronger, you need to challenge it in new planes of motion. Here are five excellent variations to incorporate:

Plank Variation Difficulty Primary Target Area Execution
Side Plank Intermediate Obliques, shoulders, and hip stabilizers. Support yourself on one forearm with feet stacked. Lift hips to form a straight line.
Reverse Plank Intermediate Glutes, hamstrings, shoulders, and upper back. Sit with legs extended, place palms behind you, and lift hips up into a straight line.
Dynamic Plank Intermediate Core control and shoulder mobility. From a forearm plank, push hips high into an inverted “V”, then slowly lower back down.
Plank to Push-Up Advanced Upper-body strength and anti-rotational stability. Move from forearms to hands (high plank) one arm at a time, then back down.
Plank Jacks Advanced Core training combined with cardiovascular conditioning. In a high plank, jump your feet wide apart and back together, keeping your torso stable.

New to Planks? Your 4-Week Starter Plan

If you’re new to planks, do not worry about holding the position for a full minute on your first attempt. Try this simple, progressive schedule:

Timeline Goal per Set Sets to Complete
Week 1 15–20 seconds 3 Sets
Week 2 20–30 seconds 3 Sets
Week 3 30–45 seconds 3 Sets
Week 4 45–60 seconds 3 Sets

Progress gradually and only move to the next week if you can maintain excellent, pain-free technique.

Reality Check: Can Planks Help You Lose Belly Fat?

One of the biggest fitness myths in the industry is that planks specifically burn belly fat. The reality is different.

Planks strengthen your abdominal muscles and massively improve core stability, but they cannot spot-reduce fat from one specific area of the body. Fat loss only occurs when you combine regular physical activity with balanced nutrition to maintain a calorie deficit over time. Think of planks as the tool that builds and strengthens the muscles beneath the fat, while your overall diet and lifestyle determine how much body fat you actually lose.

Common Plank Mistakes to Avoid

Even seasoned athletes make these structural errors. Check your form and avoid:

❌ Holding your breath during the isometric hold.

❌ Letting your hips sag toward the floor (strains the lower back).

❌ Raising your hips too high into the air (removes tension from the core).

❌ Looking straight up or ahead instead of keeping your neck neutral.

❌ Positioning your elbows too far in front of your shoulders.

❌ Prioritizing a longer hold time over proper structural alignment.

Who Should Modify or Avoid Planks?

While planks are generally safe and highly effective for most healthy individuals, you should consult your healthcare provider or a physiotherapist before performing them if you have:

  • Recent shoulder or wrist injuries.
  • An active hernia.
  • Severe or chronic lower back pain.
  • Recent abdominal surgery.
  • Pregnancy (certain modified variations are required for safety).

Stop immediately if you experience sharp, shooting pain during the exercise.

You don’t need an hour-long, exhausting workout to become a stronger, healthier version of yourself. Planks are one of the simplest, most effective, and most accessible exercises for improving core strength, posture, balance, and functional fitness. The key isn’t holding the longest plank possible—it is maintaining proper form and practicing consistently. Just a few minutes several times a week can make a highly noticeable difference to your overall strength and stability!

Pro Tip: Consistency builds results. Use the GOQii App to track your workouts, activity levels, and progress over time. Your GOQii Personalised Health Coach can recommend exercises suited to your fitness level and help you build a sustainable routine.

Frequently Asked Questions (FAQs)

  1. Are planks better than traditional crunches?

Both exercises have their place, but planks engage multiple muscle groups simultaneously (including the back, glutes, and shoulders) and improve overall functional core stability, whereas crunches strictly isolate the front abdominal muscles.

  1. How long should absolute beginners hold a plank?

Most beginners should start with 15 to 30 seconds while focusing entirely on maintaining proper form. Gradually increase the duration by 5–10 seconds as your core strength improves.

  1. Can doing planks every day reduce my belly fat?

No. Planks strengthen your core muscles but cannot specifically burn fat from your belly. Fat loss depends on your overall nutrition, daily physical activity, and sustaining a healthy calorie balance.

  1. Is it safe to do planks every single day?

Many people can safely perform planks daily if they use proper technique and do not overtrain. However, your muscles need time to recover, so if you experience deep muscle soreness, take a rest day or alternate with other forms of exercise. Listen to your body!

Disclaimer: This article is intended for educational and informational purposes only and should not be considered medical advice. Consult a qualified healthcare provider or certified fitness professional before beginning a new exercise program, particularly if you have an existing medical condition, injury, or concerns about your physical health.

#BeTheForce

  • 1
  • 2
  • 3
  • …
  • 144
  • Next Page »

Search

Recent Posts

  • Yoga for Seasonal Viral Infections: A 5-Level Approach to Supporting Recovery
  • National Ice Cream Day: A Guide to Mindful & Healthy Indulgence
  • From Burnout to Balance: How Dr. Ranjit Reclaimed His Health
  • 7 Tips to Prevent Diarrhea During Monsoons: Protect Your Gut This Rainy Season
  • Healthy Eating: The Power-Packed Quinoa Chickpea Salad

Stay Updated

Archives

  • July 2026 (17)
  • June 2026 (22)
  • May 2026 (20)
  • April 2026 (24)
  • March 2026 (18)
  • February 2026 (14)
  • January 2026 (14)
  • December 2025 (19)
  • November 2025 (15)
  • October 2025 (20)
  • September 2025 (6)
  • August 2025 (6)
  • July 2025 (10)
  • June 2025 (18)
  • May 2025 (16)
  • April 2025 (22)
  • March 2025 (26)
  • February 2025 (21)
  • January 2025 (25)
  • December 2024 (22)
  • November 2024 (22)
  • October 2024 (20)
  • September 2024 (22)
  • August 2024 (29)
  • July 2024 (18)
  • June 2024 (23)
  • May 2024 (26)
  • April 2024 (27)
  • March 2024 (27)
  • February 2024 (23)
  • January 2024 (21)
  • December 2023 (14)
  • November 2023 (10)
  • October 2023 (19)
  • September 2023 (22)
  • August 2023 (17)
  • July 2023 (19)
  • June 2023 (21)
  • May 2023 (20)
  • April 2023 (19)
  • March 2023 (23)
  • February 2023 (19)
  • January 2023 (15)
  • December 2022 (11)
  • November 2022 (15)
  • October 2022 (15)
  • September 2022 (12)
  • August 2022 (9)
  • July 2022 (17)
  • June 2022 (11)
  • May 2022 (10)
  • April 2022 (6)
  • March 2022 (6)
  • February 2022 (13)
  • January 2022 (11)
  • December 2021 (7)
  • November 2021 (3)
  • October 2021 (6)
  • September 2021 (3)
  • August 2021 (8)
  • July 2021 (7)
  • June 2021 (15)
  • May 2021 (16)
  • April 2021 (10)
  • March 2021 (7)
  • February 2021 (4)
  • January 2021 (4)
  • December 2020 (3)
  • November 2020 (4)
  • October 2020 (10)
  • September 2020 (3)
  • August 2020 (3)
  • July 2020 (2)
  • June 2020 (4)
  • May 2020 (10)
  • April 2020 (12)
  • March 2020 (10)
  • February 2020 (4)
  • January 2020 (4)
  • December 2019 (3)
  • November 2019 (7)
  • October 2019 (5)
  • September 2019 (4)
  • August 2019 (9)
  • July 2019 (9)
  • June 2019 (11)
  • May 2019 (4)
  • April 2019 (8)
  • March 2019 (8)
  • February 2019 (9)
  • January 2019 (8)
  • December 2018 (9)
  • November 2018 (3)
  • October 2018 (3)
  • September 2018 (5)
  • August 2018 (10)
  • July 2018 (6)
  • June 2018 (13)
  • May 2018 (8)
  • April 2018 (18)
  • March 2018 (9)
  • February 2018 (8)
  • January 2018 (15)
  • December 2017 (12)
  • November 2017 (19)
  • October 2017 (13)
  • September 2017 (15)
  • August 2017 (4)
  • July 2017 (8)
  • June 2017 (7)
  • May 2017 (6)
  • April 2017 (8)
  • March 2017 (6)
  • February 2017 (7)
  • January 2017 (9)
  • December 2016 (10)
  • November 2016 (7)
  • October 2016 (7)
  • September 2016 (7)
  • August 2016 (11)
  • July 2016 (9)
  • June 2016 (9)
  • May 2016 (12)
  • April 2016 (17)
  • March 2016 (17)
  • February 2016 (8)
  • January 2016 (6)
  • December 2015 (2)
  • November 2015 (9)
  • October 2015 (7)
  • September 2015 (9)
  • August 2015 (11)
  • July 2015 (9)
  • June 2015 (11)
  • May 2015 (9)
  • April 2015 (13)
  • March 2015 (8)
  • February 2015 (5)
  • January 2015 (12)
  • December 2014 (14)
  • November 2014 (11)
  • October 2014 (6)
  • September 2014 (13)
  • August 2014 (12)
  • July 2014 (6)
  • June 2014 (2)
  • May 2014 (7)
  • April 2014 (4)

From Burnout to Balance: How Dr. Ranjit Reclaimed His Health

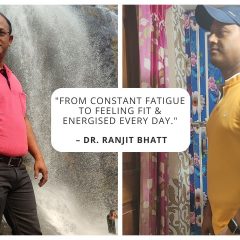
Dr Ranjit Bhatt has spent years tending to others. A practising doctor in Odisha, his days were packed with patients, surgeries, and emergencies. From the outside, it looked like a life lived in service. But on the inside, something wasn’t right. “I had no … [Read More...]

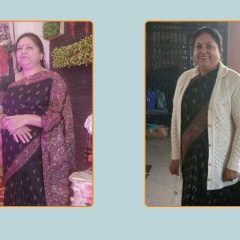
From Shimla’s Slopes to Chandigarh’s Sidewalks: Surinder Kaur Bhalla’s Journey from Chaos to Control

Some journeys start with a plan. Others begin with a stumble literally. Surinder Bhalla, a government professional, born and raised in the scenic hill town of Shimla, had always lived a life of movement. “In Shimla, you walked everywhere,” she reflects. “Walking was never an exercise. It was just life.” But after shifting to Chandigarh, […]

“I’ve Challenged Myself to Live 100 Years” – The Story of Chandubhai Savani’s Second Chance at Life

At 67, most people start slowing down. Not Chandubhai Savani. A resident of Surat, Chandubhai, thought life was on track. “My life was going well till I had my bypass surgery,” he says. That surgery, back in 2021, was a wake-up call.  Medication was routine, but exercise wasn’t. His diet? What he calls ‘normal.’ “I […]

Ananda Mukherjee Health Story

From Terminal Illness To Complete Wellness! Ananda Mukherjee Health Story

As we observe World Cancer Day under the powerful theme ‘United by Unique’ (2025-2027)**, we are reminded that every individual’s journey with cancer is distinct, yet united by shared resilience, hope, and the collective fight against this disease. This theme places people at the centre of care and their stories at the heart of the […]

  • HOME
  • HEALTHY LIVING
  • FITNESS
  • HEALTHY RECIPES
  • USER STORIES
  • KARMA
  • BUY GOQii

Copyright ©2016 GOQii