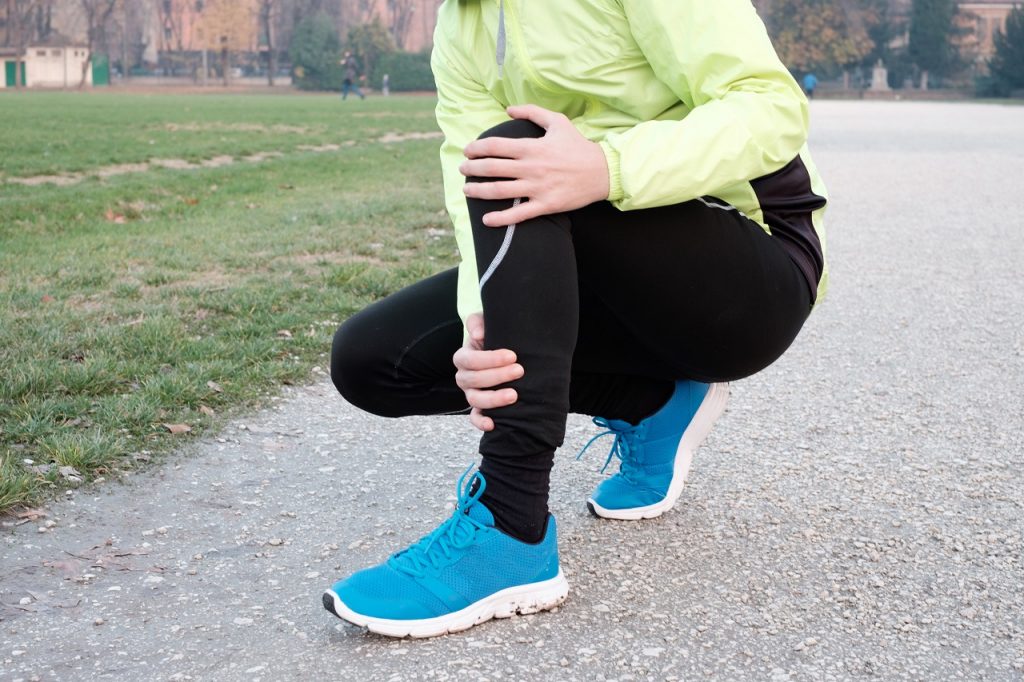
 As winter sets in, there are many health issues that some people face, and one of them is feeling immense stiffness and soreness in the legs leading to being less active. Is it normal to feel these aches and pain? or is it a serious health concern? Let’s find out the reason for leg pain during winter.
Why do we feel pain and stiffness in Winter?
According to various studies, the cold causes your muscles to lose heat and contract, this makes you feel tight especially around the joints, and eventually you tend to lose range of motion and your nerves can also be easily pinched.
Another theory says a drop in barometric pressure in winters, cause the tendons, muscles and surrounding tissues to expand. Because of the confined space within the body, this can cause pain, especially in joints affected by arthritis.
In general, during winters, we limit our movement due to the cold weather, don’t exercise much, and keep ourselves wrapped up in blankets to stay warm, eat calorie dense food and put on a few extra kilos! All these factors also attribute to increased sensation of pain and stiffness in the legs.
Whatever the reason, it is a fact that many people have “flare ups” or aggravated symptoms of aches and pains in their body especially the lower limbs. Though you may not take it as a serious health concern, one should work towards preventing and dealing with it, so that the aches and pain do not aggravate and restrict your mobility in winters.
Tips to Reduce Leg Pain During Winter
1. Keep Yourself Warm with Proper Clothing
Use cotton, wool or fleece long-sleeved clothing since these materials work the best at maintaining body heat. Wear slim-fitting clothes for your underlayer, so that you don’t look bulky and can easily move your limbs. Don’t forget to wear your woolen cap, gloves, scarf and overcoat (if really cold); with a warm pair of socks and shoes while going out for a walk or even for an outing. Long woolen socks are advised to keep your legs warm. There are woolen thermals available that cover your legs from mid thigh to ankle and are very comfortable. Keeping your muscles warm is important to feel good and comfortable. The right kind of shoe will prevent any kind of injury from a fall or slip.
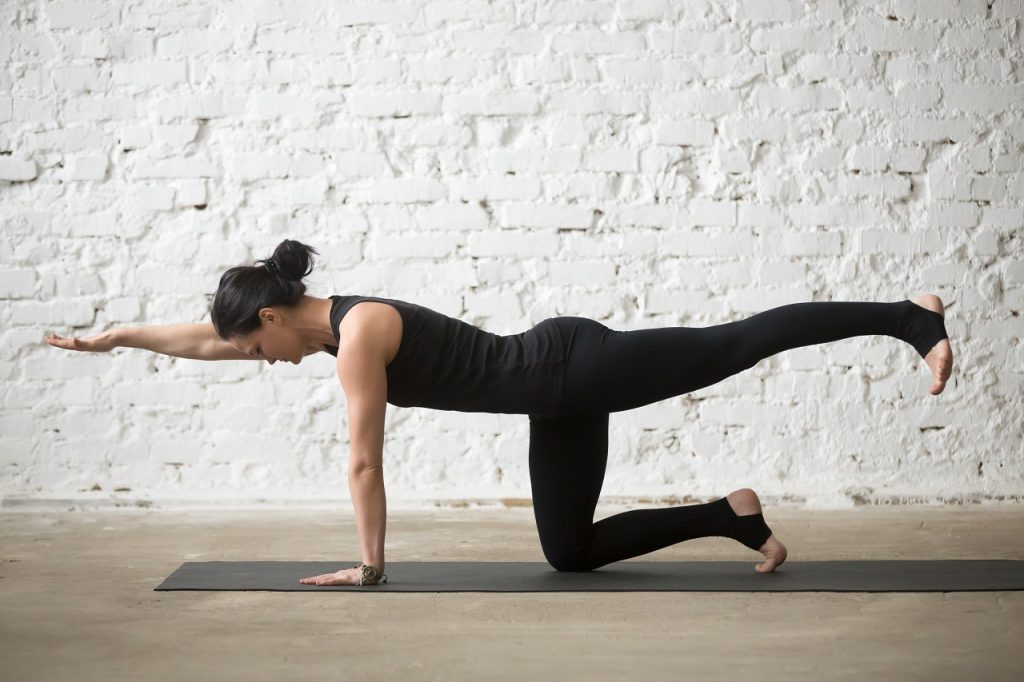
2. Stay Active
It is important to stay active and exercise your joints and muscles to reduce pain and stiffness during winters. Exercise increases blood circulation, boosts production of your body’s synovial fluid, which lubricates your joints and makes movement easy and comfortable. Plus, a good workout releases your body’s natural feel-good compounds (happy hormones: endorphins, dopamine and serotonin), resulting in reduced perception of pain and boosting your mood and overall sense of well-being. Walking and stationary cycling are good low-impact options to improve blood flow and leg strength. Just remember to warm-up a bit first and skip high-impact exercises if they bother your joints.
Some exercises you should be doing at regular intervals are:
- Ankle Circles: This exercise is great to warm the muscles in the lower legs before starting a full exercise routine. Ankle circles also increase joint flexibility. The technique can easily be performed while sitting or standing and holding a chair or railing for support.
- Leg Raises While Sitting: This exercise will improve your quadriceps strength and can be easily done while watching T.V. or sitting with friends/ family. Sit with your thighs well placed on a chair, back touching the backrest and then raise your foot up till it is in line with the thigh. Repeat both sides, 10 times each, twice a day.
- Calf Raises: By strengthening the calf muscles, you can comfortably climb up and down stairs or walk on elevated terrain. Use a chair for support, and stand on a large book or small stool. Rise up on the toes and hold for five seconds, then lower, repeat five to ten times. Drop the heels to the floor to stretch the calves. Hold for five seconds and relax.
- Standing Leg Raises: This exercise strengthens the muscles in the lower back, buttocks, hips, and thighs. Stand sideways behind a chair while holding the chair back for support. Lift the outer leg to the side while keeping it straight from the hip to the heel. Keeping the back straightened, hold for five seconds, and lower. With the same leg, stand straight and move the leg back while keeping it straightened. Hold for five seconds and relax. Repeat the process with the other leg. Perform 10 repetitions with each leg, then repeat.
- Knee Ups: High Knees are a cardio-intensive exercise performed at a fast pace. It engages your core, strengthens all the muscles in your legs, gets your heart rate up and improves momentum, coordination and flexibility. Stand with your feet hip-width apart. Lift up your left knee to your chest. Switch to lift your right knee to your chest. Continue the movement, alternating legs and moving at a sprinting or walking pace for 4-5 minutes.
Similarly there are many other exercises that you can do at home to avoid leg pain during winter, depending upon your current physical health. For instance, squats/wall squats, straight leg raises, prone leg raises, lunges, etc.
3. Add Anti-Inflammatory Components to your Daily Diet
It is important to include anti-inflammatory foods in your daily diet, to reduce inflammation, pain and stiffness in the joints and muscles. You can include super foods such as Ginger, Turmeric, Chilly Peppers, Mint and Virgin Olive Oil. Choose colourful foods like blueberries, blackberries, cherries, spinach, kale and broccoli. Opt for Salmon, Tuna, Sardines, nuts and seeds. Avoid processed foods, excess sugar and salt; high intake of alcohol.
4. Get Enough Vitamin D
During winter, Vitamin D levels naturally dip as we get less exposure to sunlight. Low levels of Vitamin D increase sensitivity to pain. Vitamin D-rich foods such as salmon, tuna, mackerel, cheese and egg yolks are important since Vitamin D helps your body absorb calcium from food, which is another important mineral for bone health that can help reduce pain. Get your levels checked and ask your doctor about supplements if your levels are low.
5. Hydrate Well
We tend to drink less water during winter, leading to dehydration and even the slightest of dehydration can cause increased sensitivity to pain. Drink at least 2-2.5 litres of water daily. You can have lukewarm water if not comfortable with water at room temperature.
6. Treat Yourself to a Massage
Massaging the legs increases the blood and lymphatic circulation, relaxes and normalises the soft tissues (muscle, connective tissue, tendons, ligaments), which releases nerves and deeper connective tissues; hence reducing spasm in the muscles and overall pain sensation. There are many essential oils that you can use to massage gently on your muscles as they have anti-inflammatory and analgesic properties, like lavender oil, eucalyptus oil, peppermint oil, rosemary oil. Other commonly used oils for massage include – coconut oil, sesame oil, mustard oil, almond oil and olive oil.
The mentioned tips, should keep the leg pain during winter away! So leave the quilts and start moving! Eat right, hydrate well, stay active, enjoy and level up this beautiful winter weather! But if your symptoms aggravate, despite all precautions, do consult your doctor.
Do you have a special remedy you use for aches and pains during winter? Share them with us in the comments below. For more winter tips, check out Healthy Reads or ask a GOQii Coach by subscribing for Personalised Health Coaching here.
#BeTheForce
 With winter around the corner, we all look forward to the beautiful, exciting days ahead! Despite the cold weather, winters bring a warm feeling that compels us to spend time with friends, family, outdoor picnics, get-togethers coupled with good food and warm drinks! Ah! You get the picture.
  Using Sunscreen during winter! What? Well, even in winters, the UV Rays are powerful enough to damage and age your skin. Before you step outside, apply a moisturizing, broad-spectrum sunscreen with an SPF of 15 or higher to all exposed areas of your body. To know which sunscreen you should pick,
  Shrug off the winter chills by keeping your energy levels up by staying active! Exercising regularly improves blood circulation and removes toxins from our system. This helps keep the skin healthy, beside other numerous health benefits. Don’t wait till New Years to join a gym. Start now!
 Remember to cover yourself up well before moving out to avoid overexposure to the cold air. Use scarves, hats, gloves, etc. to cover your head, neck and hands. If your skin is already irritated, avoid synthetic woolens and use soft, comfortable and loose-fitting clothes instead.
 With sedentary jobs and increased sitting time, we are much more prone to weak and underutilized muscles, leading to faulty postures and eventually lower back pain. So, it’s all the more important to work on strengthening our core/lower back muscles. A strong back not only makes you look aesthetically great, it also helps you maintain/improve your posture and protects from any back pain/injury. And what’s best, when you can use your own bodyweight as a tool to gain strength, rather than rely on fancy equipment!


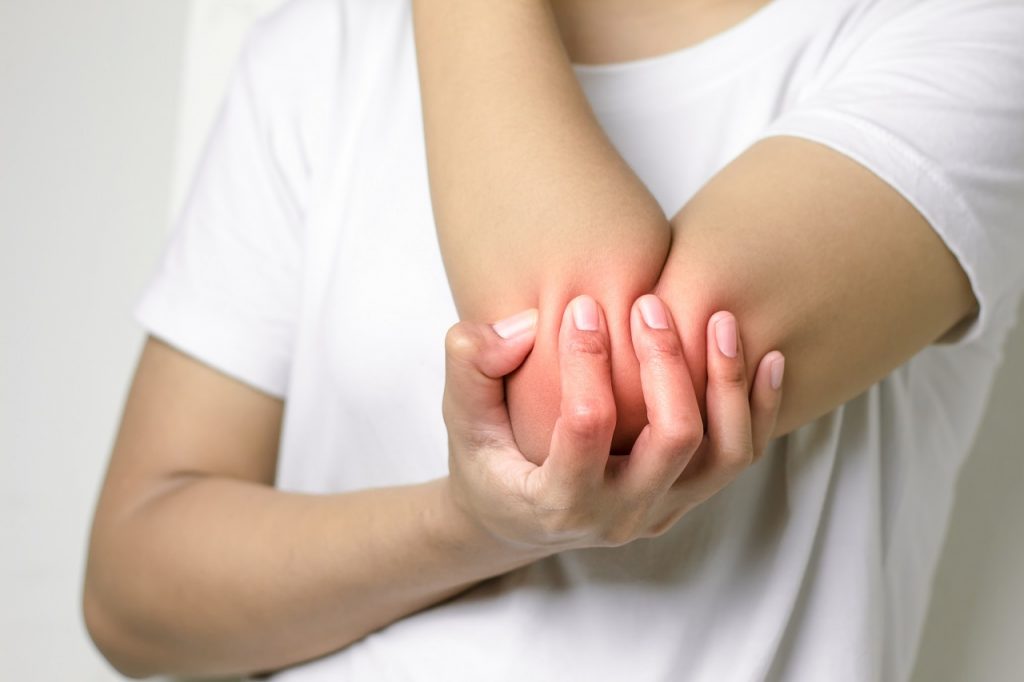 The elbow joint is a very important joint but is often overlooked because it is not a weight bearing joint and doesn’t develop arthritis generally as we grow old. But it can undergo wear and tear, get injured and the pain in the area can keep us from the daily activities of living like dressing up, combing, cooking, eating food, typing or any activity that requires use of the upper limb. So, taking care of this joint is equally important and one should not ignore the early signs of discomfort. Before we go into the remedies for aching elbows, let’s look at some common conditions of the elbow joints: